Showing posts with label make. Show all posts

Thursday, July 9, 2009

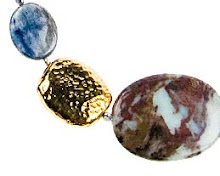
Creating your Own Hammered Finish


Creating your own hammered finish on sterling silver, gold filled or gold vermeille components is easy.


For the following , I will be using sterling silver as examples. Since there are many different types of hammer heads, this leads to an endless list of possibilities! Some tools you can consider to change the look are: a ball peen hammer, a flat nose hammer, a rawhide hammer, or a wooden hammer. Each hammer will give your sterling silver, gold filled or gold vermeille component a different result. When you are hammering your metal, try out a couple different bases underneath. You could use a piece of wood, which is a soft base, and this will provide some give to the metal, and it can bend. Depending on where you hammer your sterling silver, it can move the metal in small amounts. Try it out on a test piece to see what type of hammer dent will provide what you're looking for.

Another base is a steel block. When hammering on the steel block you will not only be creating a finish on the side you are hammering, but you will also be creating another finish on the side of the sterling silver component that is facing the steel.


*TIP* if you do not want to dent your hammer or your anvil's finish, put some masking tape on the surface you will be using, it will lessen the likelihood of you damaging your tools.

There are many bases that will give different looks pending on the hammer and the amount of resistance your surface will give. I've used a hockey puck as a base once, so I was able to easily give a hammered effect to one side of the sterling silver component, yet the other side was not affected and did not dent the same way as if it was on a harder surface like a steel block.

*TIP*Keep in mind when holding your hammer, do not point out your index finger, since this can result in injury. You want to hold the hammer at the end of the handle for the most effective hit. And be sure to use your whole arm and elbow. Misuse of a hammer can often result in wrist injuries as well.


A ball peen hammerhead will create metal divots, and pending on the size of your hammerhead, you can have something similar to pointillism or even something large like a creator and everything in between. With this you can create many unique and diversified looks on your sterling silver components.


A flat nose hammerhead will create a line. This type of simple mark can be used for a wide range of designs. For example you can fan out the pattern on your sterling silver component, or you can crisscross it like a pile of sticks.


Feel free to try out this technique, I guarantee you will have a lot of fun with it, and it can also be a great stress reliever!

Saturday, July 4, 2009

How to Create your own Jewellery Pins

There are three standard jewellery pins; head pins, ball pins, and eye pins. And then, there are always unique jewellery pins that provide a cap with in the in pin itself. Stones and Findings a wide variety of pins, including ball pins , eye pins , head pins as well as fancy pins in sterling silver, gold filled and gold vermeille.


However there are times when all you need in your design is just the bead. If your design requires nothing fancy on the end of your pin, then there is a great way to create your own pin head. This works especially well with pearls. Often basic pins are a little too thick for your standard drill hole on a pearl, too. The examples below demonstrate how you can make the different types of pins, using Sterling Silver Wire. You can however, just as easily use Gold Vermeille or Gold Filled wire.


Head Pin

Simply take a section of your sterling silver 22 Gauge wire, and cut off the desired length for your pin. Then put this section of sterling silver wire, into your parallel pliers, leaving a millimeter peeking out at the end. With a flat nose hammer, hammer the exposed bit of your sterling silver wire with a few strikes. Hammer in one direction, and then take out the pin and rotate it a quarter of the way. Then continue to strike the sterling silver tip. This will expand the metal just enough to stop your bead from sliding off the end of the wire. By rotating your piece ofsterling silver wire, you will ensure that the end of the pin is equally fanned out. And there you have it; you've created your own sterling silver head pin.


Now to the naked eye, it may not seem like you've created something that will stop the pearl, but by creating a small flat end on your sterling silver wire you will essentially stop it from sliding off.

*TIP* - to get a professional finish, use an old pair of parallel pliers, or wrap masking tape around your pliers ends to ensure that you do not leave any hammer marks on your sterling silverpins.

Eye Pin


Start by taking the end of your sterling silver 22 Gauge wire, and using your round tip pliers, bend into a small circle at the end of your wire piece. Then, depending on the length you need for your project cut about 1cm or more from your sterling silver wire. This will allow you to have extra room to wire wrap once you've put your stones or beads onto the finished sterling silver eye pin.


Ball Pin

For this project, it would be ideal to have access to a torch. With it you can heat up the end of your sterling silver wire, applying a small amount of heat and the metal will ball at 1640f/893c. Once your sterling silver wire has started to ball, take the heat away, quench and polish the piece and then you will have your home made sterling silver ball pin.


*TIP* - if you are using soft sterling silver wire and find it too soft for your project, take the section needed and hold it from end to end with your two parallel pliers. Then twist the piece of sterling silver wire in opposite directions and it will harden a bit. Twist it a lot and you'll have your soft sterling silver wire to harden in no time!