Saturday, September 12, 2009

Designing with Tourmaline


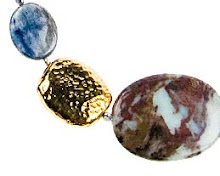
Tourmaline is one of the most chemically complicated gemstones around, and it shows in the unmatched variety of available colour schemes. Several colours may even be present in the same piece, and will appear differently when viewed in different kinds of light and from different angles. A truly dynamic stone, indeed!

To add to the intrigue of this bizarre and beautiful mineral species, Tourmaline is naturally pyroelectric: when heated or compressed, it takes on a positive electric charge at one end and a negative electric charge at the other. This interesting quality was known by British importers in the 18th century, who made use of the charge to pull ash out of their pipes.

At that time the Dutch East India Company was importing vast quantities of Tourmaline from Sri Lanka to insatiable audiences in Europe. Almost two centuries later, Empress Dowager Cixi- the last Empress of China- also entered the Tourmaline trade, regularly shipping tonnes of it from Californian mines. Her appetite for beautiful pink tourmaline was apparently so voracious that it single-handedly created a prosperous mining industry in San Diego County.

Associated with amorous emotional energy, Tourmaline is seen as the gem of lasting love and friendship.

Click here to browse Tourmaline at Stones and Findings

Sterling Silver Informational Organization

Organizing Sterling Silver Findings


I really can't say enough about the importance of organizing one's supplies, like sterling silver findings. There are two different categories of organization: physical organization, and informational organization. And I'd like to touch on both and tell you a bit from personal experience, and invite you to send me your thoughts, personal solutions that you'd like to share with others, and tips on how to improve our system at Stones And Findings. In this article, I will talk about the informational organization of sterling silver components and jewellery.

Informational Organization


Informational organization is different from physical organization , and it's an area that many creative people tend to neglect. As the jewellery business grows, this part becomes more important and can be one of the biggest bottlenecks for growth. Supplier and cost information must be kept in a complete and easy to find manner. Without knowing the cost, you run the risk of pricing too low, especially if you are dealing with larger quantity orders or more reorders. Without knowing who the supplier is, it becomes time consuming to trace back and approach all of the likely sources if you need to reorder. You'd be surprised at how many customers email us to find out if we were the ones who sold them certain sterling silver findings , and usually they’re in a desperate hurry to know. Sometimes people call in to reorder some sterling silver findings that are "roundish and kind of shiny" . Well, that doesn't help much. Thankfully, we have all of their past orders, with pictures, on our computer screen. However, we'd still have to go over 10 or 15 things that fit the description before ascertaining the desired roundish shiny thing.

The most inexcusable disorganized people are the suppliers. When I bought from local sources for my jewellery making business quite often they would ask me to send the actual sample because they had no codes to begin with. And even if I give them codes that we agreed on before, they've forgotten. I resorted to creating a file in their office, and with each item I bought, I made sure they kept the sample in that file, with a code we agree on. I was buying large quantities, so I could do this and they wanted to make the effort. Even still, I'd they would prefer I bring a sample in because they couldn't figure things out and was not confident in their file. Well, by the time I send them the sample, and they receive it, it could be several days. It's just so unproductive. And I vowed that we would not be like that at Stones and Findings.

There are some very simple things that you can do to help yourselves keep organized:

  • keep set of actual sample of sterling silver findings in Ziploc bag with code info


  • Photocopy the component if can’t or don’t want do above


  • Use a binder and some slide holder sheets to keep samples and pictures of sterling silver components organized


  • Create folders in your email Outlook for suppliers, different folders for each supplier. Ditto with document, hard or soft copy


  • Ask suppliers to email you copy of your invoice, in Excel format. Use this to cut and paste into a Master order form for the supplier. Enter reorder quantity and save as another PO. While you are doing this, you can also look through to see what else you've bought from them on that list that might be running low.


  • Create a shopping list of staples that you use regularly. Keep it in a place that you'll look at as you create orders. The staples list is a reminder so you don't have to pay extra shipping just because you forgot some sterling silver findings that you use all the time.


  • Stones and Findings will be switching to our alphanumeric codes, which will be only 5 digits/letters long. This is will be more efficient. However, it will not affect your records or reorders as both codes can be used. We're always trying to be more organized, and with ever an increasing selection of sterling silver findings, it will be necessary.


    If you have any tips or ideas, please email them to us at Lucy@stonesandfindings.com

    If you would like to read about Physical Organization of Sterling Silver Findings and Jewellery Components please click here .

    Wednesday, September 2, 2009

    A 15 Point Guide for the Independent Jewellery Art

    by Damien Zielinski


    Materials and Accounting

    1. Keep your overhead low. You don't need a studio and can't afford to pay for one when you're just starting out your jewellery business. If your apartment has a spare room, or even a big dining room table, it should be enough to get you started.

    2. Buy jewellery supplies from local wholesalers. Do not travel further than a bus token's distance for jewellery components. Time and cost are both important to consider.

    3. Keep your jewellery inventory as low as possible. Jewellery stock is expensive; do not order too many jewellery components at first. Buy very low volumes while you test the market power of your jewellery designs. When you become more confident about demand for your accessories, order more, but remember to always keep as little inventory as you can. Try not to ever order more than you're sure you can sell.

    4. Buy parts from a jewellery wholesaler who offers low minimums, and start with the lowest. If you buy quantities any smaller, you will have to get middle-manned by stores or jewellery businesses that cater to hobbyists. If you go bigger, you risk unsold stock, and may not break even with sales.

    Design

    5. Find out what retail stores are looking for, what they sell a lot of, and who's buying it. It is very important that you spend a lot of time on groundwork and preliminary research. The more you know about your intended market, the more informed your jewellery designs will be. Talk to people and develop a thorough understanding of what your design strong points are, how to build on them, and how to tailor them to the demands of your target customer base.

    6. Keep up with the changing world of accessory fashion and be flexible. Staying informed about what people are wearing on the streets and the runways will inform and inspire your work. Quickly adapt to new trends and styles-- being able to do this is a major part of your advantage as a small scale jewellery manufacturer. Avoid ordering parts from far away or keeping old stock.

    7. Think about the role of each jewellery design in your portfolio of accessory lines. If all of your jewellery is generic in style, then it will only be a matter of price for your potential customers, and as an independent you don't have a prayer competing with big companies who import cheap Asian materials. On the other hand, if all of your designs are show-stopping runway pieces, they will garner attention but not profits. Stores like to put showpieces in windows to attract curious shoppers, but the jewelry they actually sell a lot of is going to be the kind that people can wear in a variety of social situations with a variety of outfits. Try to incorporate a handful of distinctive showpieces, but make sure your lines have something for everyone, and aren't too fashion-forward that they scare off the majority of your would-be customers.

    8. Be flexible and dynamic. Demonstrate a ready willingness to customize your designs for stores and individual clients. Make use of your advantage as a small manufacturer who can change production and redesign things at the drop of a hat. Cooperating with the customer's desires is important to developing a good working relationship, and leads to sustained repeat business.

    9. Value people who give you constructive input, and learn from it. Treasure those who give you helpful ideas, and learn to take criticism with grace. Remember that you're running a business, and what you think is great might not be exactly what stores or people want. You're not trying to sell jewelry to yourself. Build on strengths, expand on what is well received, and get rid of unpopular or unsuccessful design ideas immediately.

    10. Guard your designs. They are your most precious commodity and there is not much in place to protect them from copycats. Show them only to people you trust, customers, and potential customers.

    Selling your Jewelry

    11. Calculate your cost. It is crucial to figure out how much each jewelry accessory costs you to make, and how much time you spend making it. Your markup should be 2-3 times cost for wholesale or 4-6 times cost for retail.

    12. Be opportunistic about sales prospects, and carefully weigh the pros and cons of each. Selling to people directly is great for profit margins, but is very time consuming and may not worth your while. Jewelry conventions, shows, festivals, and other gatherings might be good times to set up a booth and personally connect with each customer. Just remember that time is one of your most precious resources. If you manage to get your jewelry accessories into boutiques, they will sell your product for you on their time, and provide a venue for showcasing your jewelry on top of any events you may personally go to.

    13. Avoid selling your jewelry on consignment at all costs. Consignment means that a store will not buy jewellery from you outright, but rather keep it at their store on a sort of 'loan.' If items are sold, the store will take a percentage of the sale price, and you will get the remainder. The store has little motivation to push your jewelry, and if they have other accessories bought on wholesale, they will almost definitely try to sell those pieces before yours. With wholesale the jewellery is actually purchased up front by the store, and the onus is on them to either sell the items through or incur losses. For more information on differences between consignment and wholesale, please see our more in-depth exploration of the topic.

    14. Develop positive and lasting relationships with your jewellery customers. Retail stores will want to see that you are reliable, consistent, and responsive. Drop by fairly frequently to see how your jewellery is selling, and talk to the store owners and employees to get feedback on what they like about your jewellery designs, who's buying them, and how they might be improved upon. For the sake of following up easily, you'll want to avoid selling to stores that are inaccessible or far away.

    15. Do not take jewellery orders from stores that are too big for you to handle. Mathematically, one order should never exceed 10% of your yearly sales. Put another way, the outstanding debt of one customer should never exceed an amount you are willing to lose. If you do take big orders then be incredibly careful and make sure you're going to get paid. Even large department stores can be very fickle and prone to changing their minds. If this happens you could be put under by one big order that falls through, leaving you in debt. This tip is part of an important guiding philosophy: build up slowly and don't bite off more than you can chew.

    25% JEWELRY COMPONENT SALE!


    From earring hooks to charms to rings!
    In gold filled, gold vermeille and sterling!
    http://www.stonesandfindings.com/specials

    Create a Satin Finish on Sterling Silver


    Then there is the satin finish. Simply take your existing component, and then you will be creating a lightly scratched surface. You can do this a couple of ways, very lightly brushed a fine S.O.S. pad – don't press to hard at first, and see the difference between the original finish, and what you have just created. If you prefer a deeper finish then press harder and continue until you like the finish you have created. When you’re satisfied with the new finish you’ve made, then proceed and complete the rest of the piece. If you have small crevices feel free to cut a small piece off and twist it, or wrap it around a cotton swab to get the recessed areas.


    If you're looking to take a brushed finished surface down to high polish finish, you must use a lighter grade of emery paper to achieve a smoother look. You can even go all the way to a high polish finish and then perform your satin finish on the piece for a well finished look.


    If you are going to satin finish from a high polish finish, you can mix up the finish by using some great tricks. This can put together a dynamic look, even if this is your first time trying out this method. By using a piece of masking tape, simply cut out a shape, or tape off an area that you do not want to give a satin finish and you will then create your finish that will have a fantastic contrast with in the metal itself. This method is perfect for mixing up a regular plain component and making it your own.


    This finish can be mixed together with pieces that are a high polish and pieces that have a satin finish, and any other finish, like hammered that you've created for your components for your piece will have that extra stunning feature that makes your piece, truly a one of a kind.

    Create Brushed Finish on Sterling Silver


    The third is very similar to the satin finish , however you will use more aggressive means to obtain your new look. To create the brushed look, the finish will have more distinctive lines. You can use many things to create look. By hand you could use, and emery board or a file. Or you can use a course steel wool pad, a ball of aluminum foil or any other course metal or abrasive material.


    With all of the above methods, I suggest either working at your bench, where you can clean up any metal shavings that may come off your piece. Otherwise working on a table with some newspaper down to catch the shavings is perfect. Take each piece you'd like to brush, and be sure to brush all sides, if it tends to slide, feel free to put a small amount of tape on your surface, in a loop, so it will stick to the surface and to the other side of your piece and stay still the entire time you’re brushing your component.


    **Be careful with gold vermeille, as gold vermielle is sterling silver that is been plated with 14kt gold, so be wary of putting any aggressive finishing techniques as the gold may come off.

    When creating your own brushed finish, it can be used in many different ways. If you're looking for a more defined look than satin, but not as rough as a hard brush with an emery board. You can complete a piece in full, and then run it through a steel wool pad, or a 3M pad. This will give it slight more edge than your regular satin finish. Or you can brush each individual piece and then put them all together. But, be sure to think of the small things, which will really bring the whole design together. Pieces that are often forgotten are components like jump rings , the clasp or the bail . These are parts that, if brushed, will complete the look. And remember, mix it up, and have fun with it!

    Create a High Polish Finish on Sterling Silver


    The high polish finish is often a standard finish, the reasoning is, is that this finish can be done a few different ways. A high polish finish can be used using a tumbling machine, be done by hand, or be done by a polishing wheel. A quick way to finish, and this is why it’s often a standard in so many components is that you are able to tumble these piece and in a few short A standard in jewellery components, they have often been tumbled to achieve this finish. You can use a rotary tumbler to polish jewelry and to remove burrs from jump rings or other metal components.


    Materials List

    • Small rotary tumbler and barrel.
    • Soap (not detergent). Ivory soap flakes are recommended.
    • Polished steel shot. You want enough to fill the barrel about halfway.


    Procedure

    • Pour the shot into a clean barrel to about the halfway mark.
    • Add enough water to cover the shot plus about 3/4 inch.
    • Add a tablespoon of soap flakes.
    • Load the jewelry and/or components into the barrel. You want them to be able to tumble, so pack them loosely.
    • Seal the barrel and let the tumbler rotate for 6-8 hours.
    • When the pieces are sufficiently polished, remove them from the tumbler and rinse them well with water.


    Helpful Tips*
  • Keep your steel shot covered with soap and water. All it takes is a few hours exposed to air for the shot to develop rust.
  • Don't polish more than one chain at a time unless you derive pleasure from untangling some serious knots. You can add other jewelry in with a chain (earrings, rings, components), just don't polish chains together.
  • If you use the same barrel for jewelry as you use to polish rocks, make certain that the barrel is absolutely clean. Otherwise, you may find yourself scratching your jewelry rather than polishing it!
  • Remove chemical 'antiquing' before polishing. Otherwise, a chemical reaction can cause green deposits to coat nooks and crannies.
  • Use extreme care if you are polishing plated or filled components (e.g., silver-plated or gold-filled). You run the risk of wearing or chipping the outer layer of metal.
  • Don't tumble components with stones, as they can become scratched or dislodged from their settings.
  • However you can take this to the next level, so it will be free of knick and scratches. If you have three different grades of emery or sand paper, and a rouge cloth you will be able to reach this yourself. A Rouge Polishing Cloth and it will really bring out that shine for your components.


    When deciding on what finish to use, there's no need to only use just one. Be sure to mix up the finishes. Placing a high polish finish next to a brushed finish or even a satin finish can have a very beautiful effect and create a stunning and dynamic one of a kind piece.


    *Credit to About.com for information about tumbling jewellery
  •