Then there is the satin finish. Simply take your existing component, and then you will be creating a lightly scratched surface. You can do this a couple of ways, very lightly brushed a fine S.O.S. pad – don't press to hard at first, and see the difference between the original finish, and what you have just created. If you prefer a deeper finish then press harder and continue until you like the finish you have created. When you’re satisfied with the new finish you’ve made, then proceed and complete the rest of the piece. If you have small crevices feel free to cut a small piece off and twist it, or wrap it around a cotton swab to get the recessed areas.
If you're looking to take a brushed finished surface down to high polish finish, you must use a lighter grade of emery paper to achieve a smoother look. You can even go all the way to a high polish finish and then perform your satin finish on the piece for a well finished look.

If you are going to satin finish from a high polish finish, you can mix up the finish by using some great tricks. This can put together a dynamic look, even if this is your first time trying out this method. By using a piece of masking tape, simply cut out a shape, or tape off an area that you do not want to give a satin finish and you will then create your finish that will have a fantastic contrast with in the metal itself. This method is perfect for mixing up a regular plain component and making it your own.

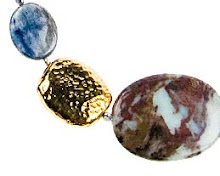
This finish can be mixed together with pieces that are a high polish and pieces that have a satin finish, and any other finish, like hammered that you've created for your components for your piece will have that extra stunning feature that makes your piece, truly a one of a kind.


No comments:
Post a Comment